Grout Cleaning

Welcome to my Work History archive where you will find detailed examples of the cleaning and renovation of Grout carried out in Devon

Cleaning and Renovating Grout

The top layer of grout is porous and can absorb grease, dirt and limescale. Spillages such as wine, lemonades or greasy substances will cause marks and patches in the joints in the floor. Grout between wall-tiles particularly in damp areas like bathrooms will become dirty and unattractive as a result of Mould, Mildew and Limescale.

Mould is one of the most unsightly problems, which usually starts off in the wettest area of the room, this could be the bottom of the shower or bath, then starts to spread and if left unchecked could cover a large area of the wall.

Another common issue we find is a problem known as Grout Haze or Grout Smearing where a thin layer of grout has been left to set on the surface of the tile. Once grout has set it is difficult to remove.

Discolouration of grout joints in bath or shower areas due to continued use of acid formulated shampoos and soaps. This causes yellow orange and pink stains to the grout over even a short period of time. Whilst Grout Joints can be cleaned, badly stained grout may need to be re-coloured.

Protecting your grout in advance with a sealer will prevent most of these issues and although relatively unknown in the UK, protection awareness is growing. Sealing forms an invisible barrier between the grout and the surface, this will then protect your investment for years to come.

We have solutions for all the problems listed above and below you will find detailed examples of work we have carried out in the past to resolve many of these issues. It should give you some idea of what’s involved and what can be achieved with the right techniques and products.


Marble Tile and Grout Cleaned and Polished in Crediton Devon

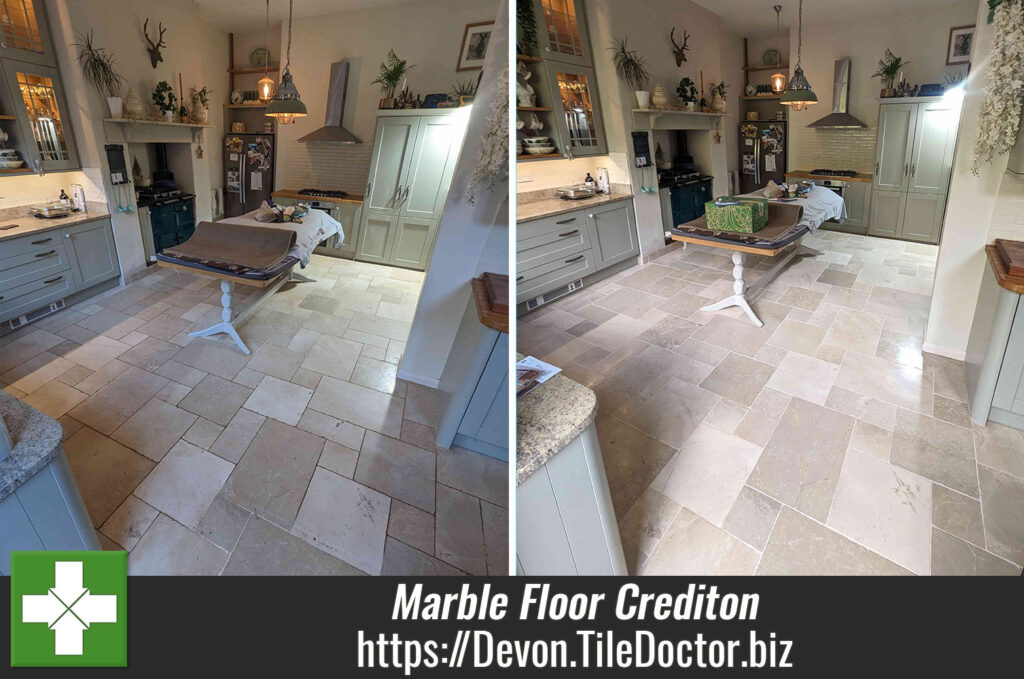
Grout Cleaning and Polishing a Marble Tiled Kitchen Floor in Crediton

This customer in Crediton originally enquired about grout cleaning for their Kitchen floor, however after speaking to them on the phone I discovered their tiles where Marble and so I suggested they may be interested in our stone polishing service as well.

Interested in the possibilities I arranged a time to pop over to the house and conduct a survey and test clean. I’m based in Crediton, so it wasn’t long before I was able to pay them a visit. Whilst there demonstrating grout cleaning, I explained how Marble responds wonderfully to our diamond pad burnishing system and would be possible to go one step further and make this floor a ‘wow’ feature again. I conducted a quick demonstration of the burnishing process which went well, and they agreed it was definitely something they would like to have done and were happy to book me in for both jobs.
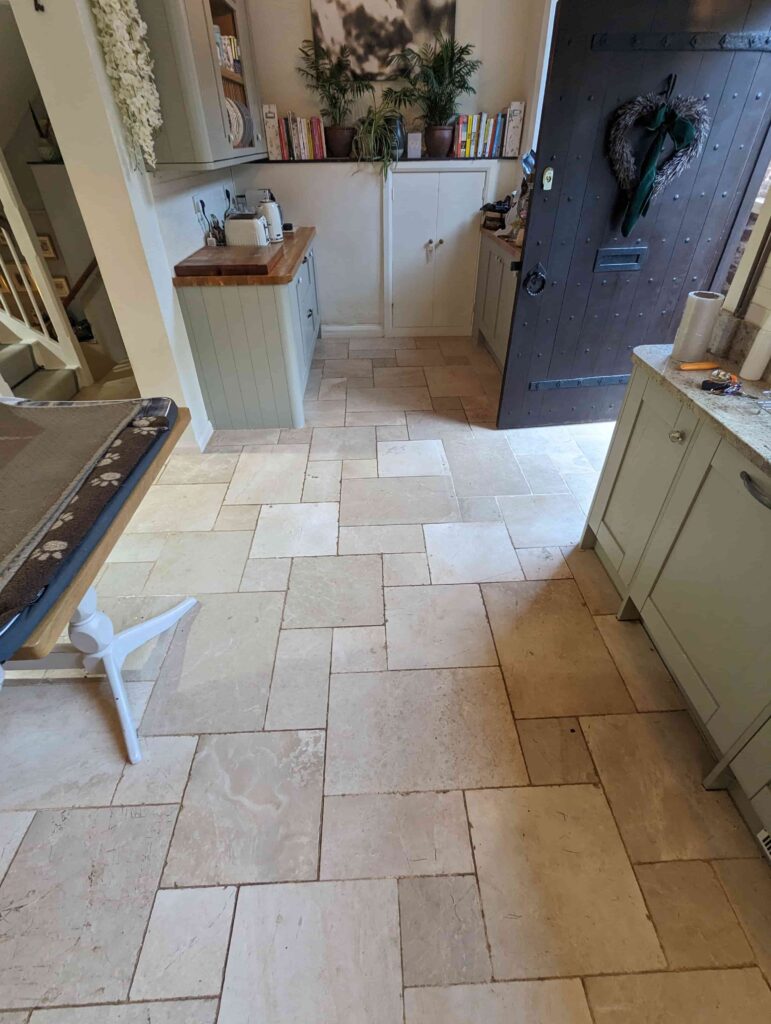
Marble Tiled Kitchen Floor Before Cleaning Crediton

Having agreed my quote the only thing that was left was to agree a date to do the work which would take two days. As it turns out they had planned a holiday and so I it was agreed I would do the work whilst they were away to minimise disruption.

Marble Tiled Kitchen Floor Before Cleaning Crediton

Deep Cleaning Grout and Marble Kitchen Tiles

To start, I added low level protection to then the bottom 7 inches or so of the kitchen units and walls to stop any slurry splashes. After this I applied a coat of Tile Doctor alkaline cleaning/stripping product called Remove & Go and left to dwell and soak into the stone. This emulsified and broke down what remained of the existing sealer and ingrained dirt in the grout lines which was causing the discolouration.

After ten minutes the solution was then worked into the floor using a Black scrubbing pad fitted to a rotary floor buffer. Where needed I also used a stiff grout brush along the grout lines until I was satisfied it was as clean and White as it could be. The soiled liquid was then rinsed off the floor and extracted with an industrial wet vacuum.

Next I started the burnishing process with the application of a coarse 400-grit diamond pad fitted to the rotary machine. Using only water for lubrication the pad was worked into each tile until I had covered the whole area. I then repeated this process through 800 and 1500-grit pads extracting the slurry between each pad with the wet vacuum. The pads deep clean the Marble and slowly refine the surface to build up the polished appearance.

After the 1500-grit pad I put several floor fans in place to accelerate the drying of the Marble floor before applying the last pad in the burnishing system which is a very fine 3000-grit polishing pad which adds lovely shine to the Marble and is applied dry with only a little water sprayed onto the tile.

Once done the burnishing work had been completed and it was time to let the floor completely dry out overnight so it would be ready for sealing the next day.

Sealing a Marble Tiled Kitchen Floor

I arrived in the morning and began work by inspecting the floor and taking a few moisture readings to ensure it has completely dry. I was happy with how clean the Grout looked and how well the Marble had responded to the burnishing process. The floor had that smart, eye-catching polished appearance and just needed sealing to protect it from dirt becoming ingrained into the pores of the stone.

Having discussed choice of sealers with the customer previous we had agreed to seal the floor with Tile Doctor Colour Grow. This is a great choice for Marble as it contains a colour enhancer that intensifies the lovely natural mineral colours in the stone which otherwise are lost when dry. Two coats were needed, allowing the first coat to dry before applying the second.

Marble Tiled Kitchen Floor After Polishing Crediton

A few days later I heard back from the clients who had just arrived back from their holiday, they were overjoyed with the results I achieved not just to the grout but how well their Marble floor now looked. For aftercare cleaning of polished stone floors, we recommend using Tile Doctor Stone Soap, it’s compatible with sealers and helps maintain the patina on the stone.

Marble Tiled Kitchen Floor After Polishing Crediton


Professional Cleaning and Polishing of a Marble Tiled Kitchen Floor in Devon

Grout Cleaning and Polishing a Marble Tiled Kitchen Floor in Crediton Read More »

Porcelain Tiled Floor Before After Renovation Sidmouth Exeter

Textured Porcelain Floor Tile and Grout Deep Cleaned and Tile Replaced in Sidmouth

We were contacted by a property owner in Sidmouth near Exeter about their Textured Porcelain floor tiles in the kitchen and hallway which needed a deep clean. The tiles themselves were looking grubby and the grout had become stained and darker with ingrained dirt.

Porcelain Kitchen Diner Floor Before Cleaning Repair Sidmouth

There was also a damaged tile that needed replacing which I was happy to do. We often get asked to replace tiles but we don’t really take on tiling work unless it’s part of a bigger renovation project.

I discussed with them the service we offered and gave them a price for the work, which they were happy to proceed with. We arranged a date to complete the work the following month.

Cleaning Textured Porcelain Hallway and Kitchen Floor Tiles

I started by removing all the kickboards from below the kitchen units and then running a bead of clear silicone sealant around the bases. We tend to use a lot of water when cleaning tiles and as most kitchen units are made from MDF we like to prevent any water becoming absorbed into the units. This will prevent them becoming warped by the water so it’s worth taking the time to remove or protect them. I also added protection around the skirting boards.

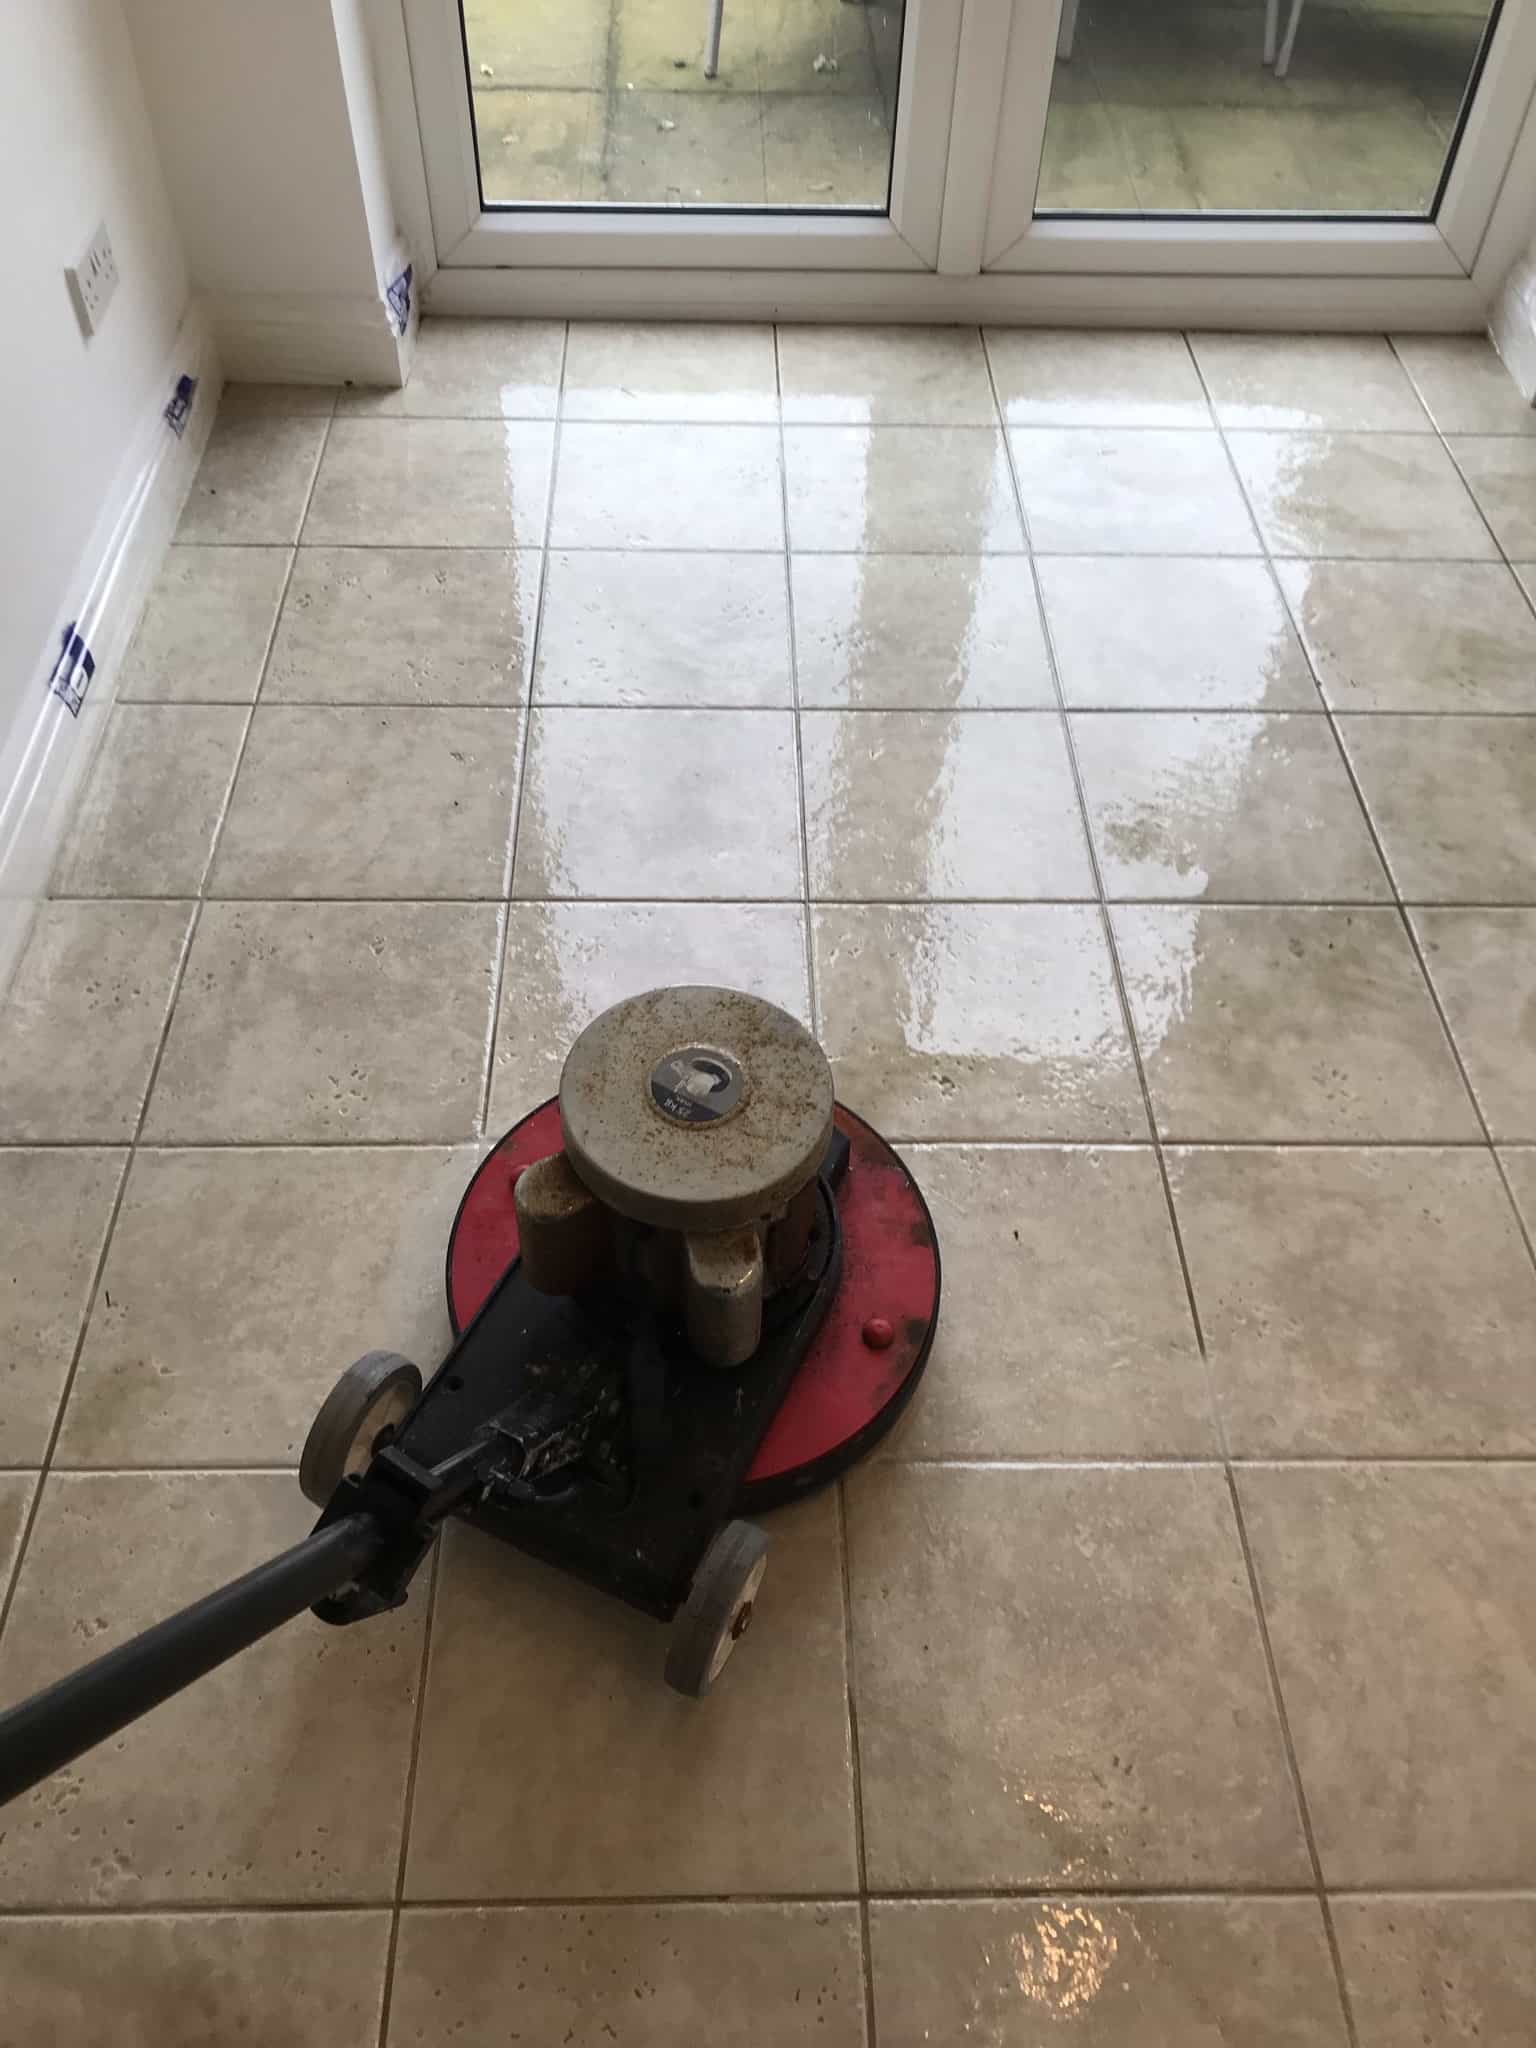
The cleaning process began by spraying Tile Doctor Remove & Go onto the floor, this is an alkaline cleaner designed to remove dirt and other coatings. I left it to soak in for 45 minutes before starting to work it in with a rotary buffer fitted with a black scrubbing pad. The long dwell time gives the product time to digest and loosen the ingrained dirt in the textured tile, dips, and grout lines.

Porcelain Kitchen Diner Floor During Cleaning Sidmouth

After scrubbing the tiles, they were then rinsed with a small amount of water. I used a pressurised truck-mount water vacuum system fitted to my van to extract all the remaining soil and product from the floor.

With the soiling removed the floor was left to air dry (which took an hour or so) before neutralising the floor and removing old grout smears with a diluted acid rinse using Tile Doctor Grout Clean Up. After the rinse floor was given another rinse and once again the waste extracted using the truck-mount system.

After this treatment, the floor was looking so much better and I hadn’t finished.

Replacing a Porcelain Kitchen Tile

Returning the following day, the last step was to remove a broken tile and replace with a new matching tile the client had provided. I always recommend buying more tiles that you need and then keep those extras in the loft or something as you never know when they might come in handy.

To remove the broken tile, I stated by cutting though the grout lines separating it from its neighbours and then carefully breaking the tile up for with a hammer action drill fitted with a chisel bit. The bits of old tile were removed and what was left of the grout was removed using a small Grout-Out tool.

Porcelain Kitchen Diner Floor During Tile Replacement Sidmouth Porcelain Kitchen Diner Floor During Tile Removed Sidmouth

You have to be careful when doing this sort of work as many modern kitchen floors are installed with an electric heating matt which is easily destroyed when lifting a tile. In this case there was no matt under the tile but to my surprise the was another tile so it was clear that the tiler had simply tiled over an existing tiled floor. I hear this is a popular thing to do as a tiled floor usually makes a good base.

With the area cleaned up, it was simply a case of applying fresh rapid setting adhesive and fitting the new tile in place. Once the adhesive had set, I grouted using a lime colour Mapei Grout and the job was complete. Most Porcelain tiles are sealed in the factory so it was not necessary to apply one.

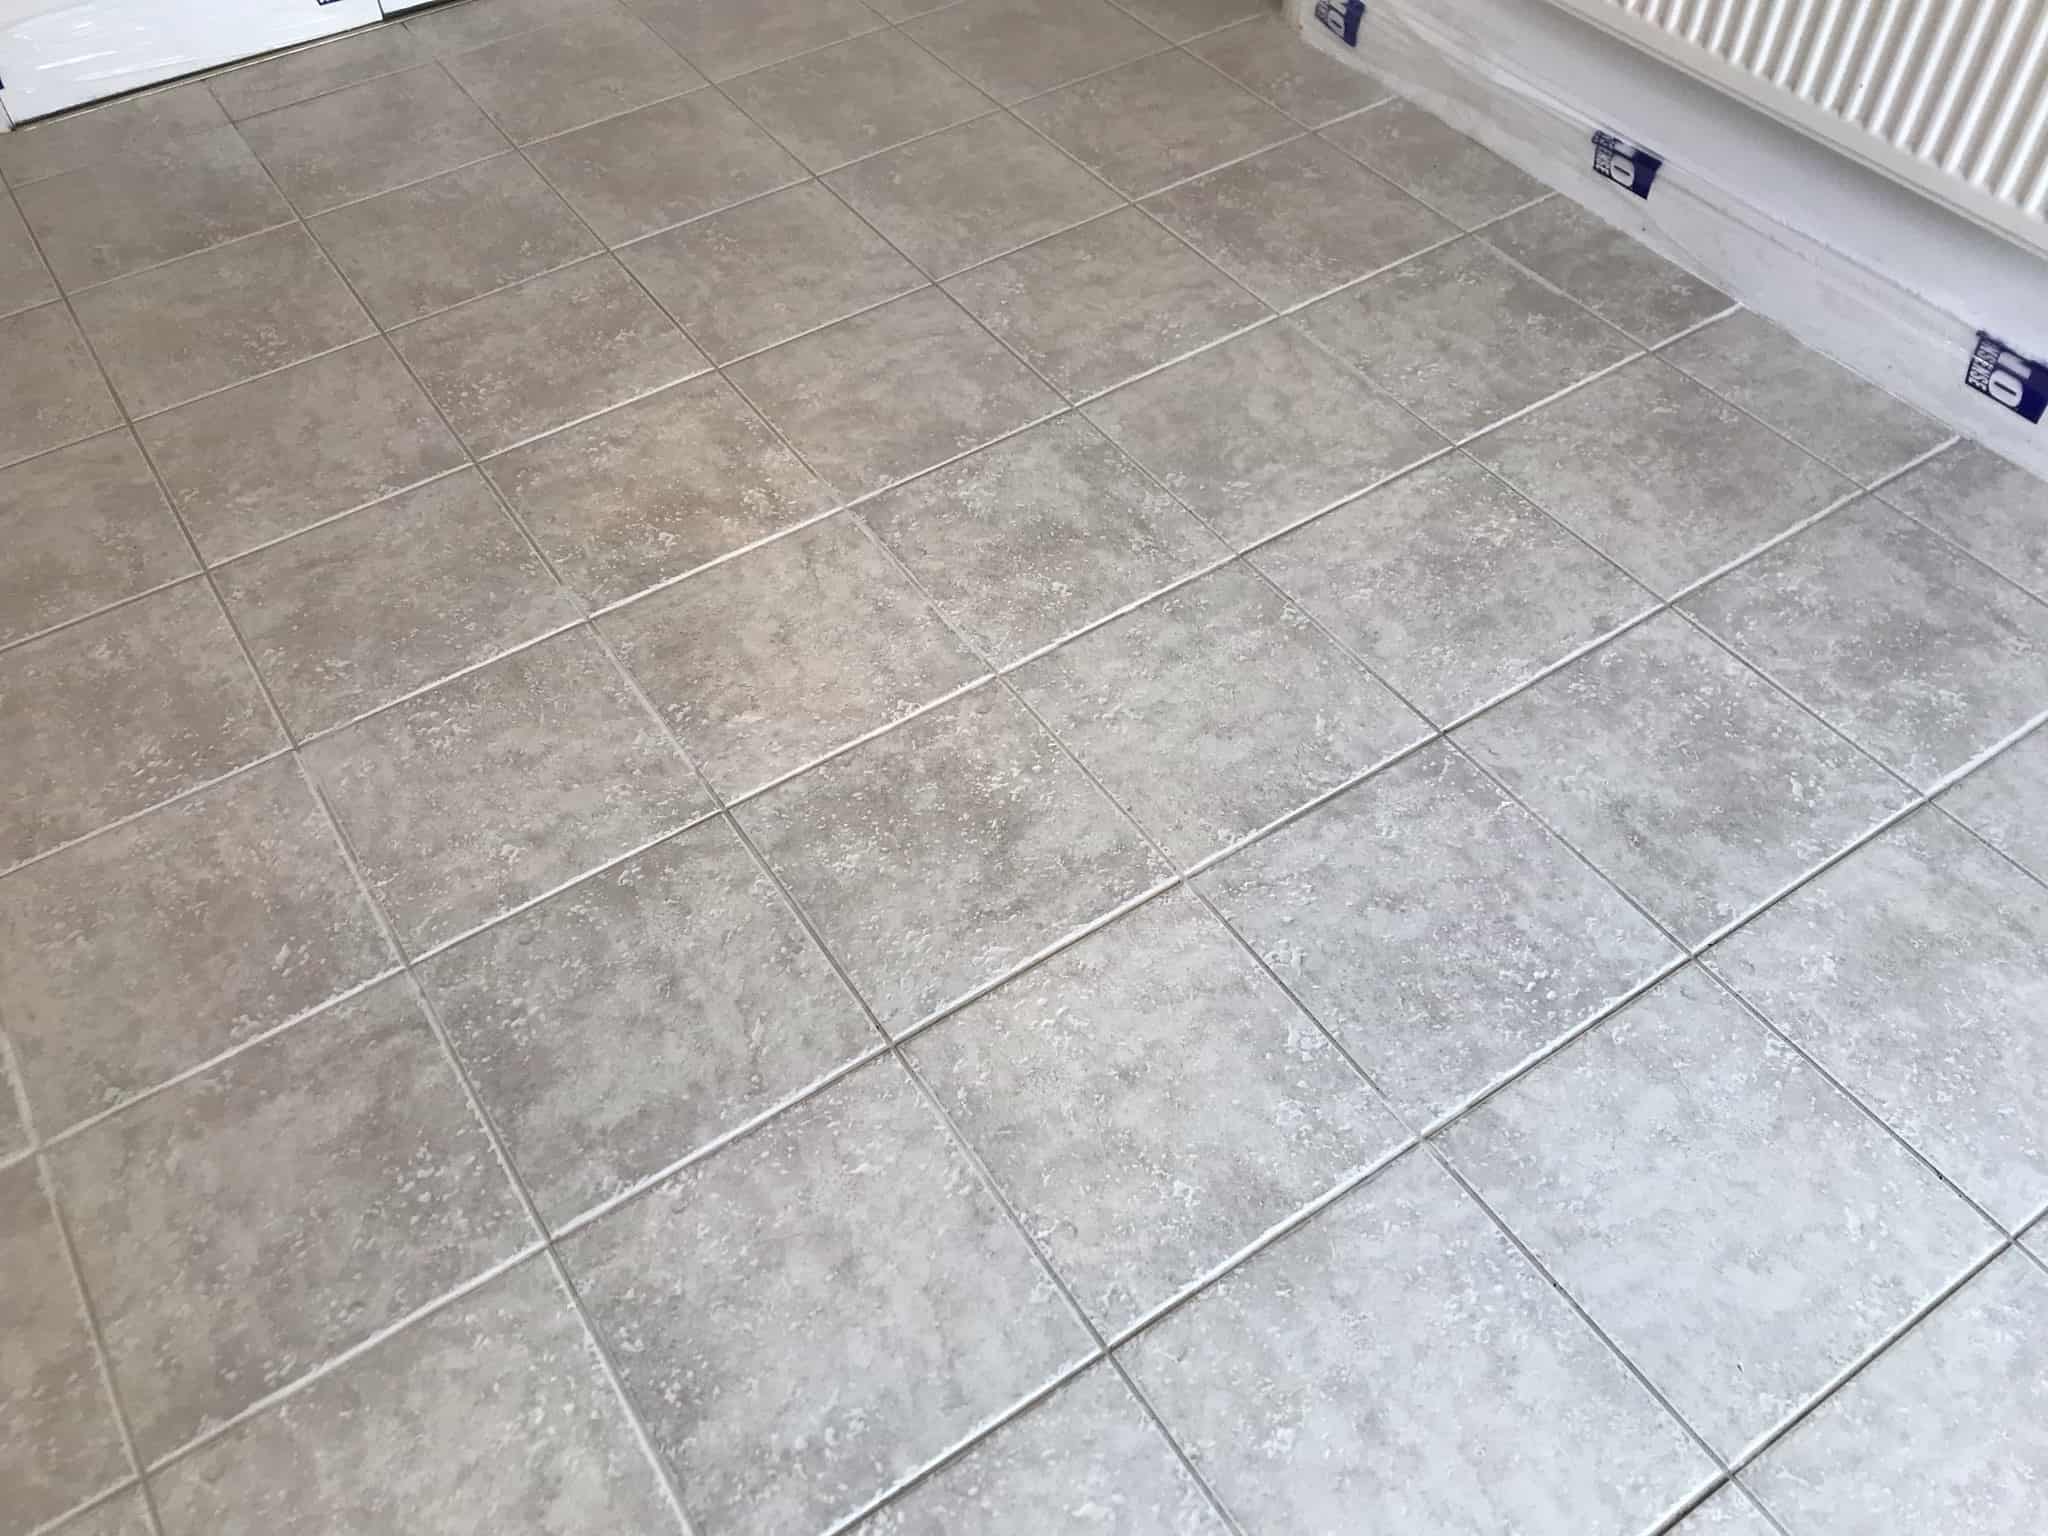
Porcelain Kitchen Diner Floor After Renovation Sidmouth

The result was a fresh and tidy Porcelain tiled floor with a marked improvement particularly on the grout lines and of course a very happy client.


Professional Renovation of a Porcelain Tiled Hallway and Kitchen Floor in Devon

Textured Porcelain Floor Tile and Grout Deep Cleaned and Tile Replaced in Sidmouth Read More »

Porcelain Tiled Floor Grout Coloured West Hill

Changing the Colour of Grout on a Porcelain Tiled Floor in West Hill Devon

The owner of this house in West Hill village, Southeast Devon was unhappy with the cream colour of the grout on their Porcelain tiled floor. The problem was any discolouration was very noticeable and although it matched the colour of the Porcelain tiles quite well it wasn’t a practical colour and it did nothing for the overall look of the floor.

Porcelain tiles usually don’t need a sealing unless they are the micro porous type so what tends to happen is any dirt becomes washed into the grout lines during cleaning where it becomes trapped in the surface of the cementitious grout.

We discussed removing the grout completely and then re-grouting with a darker shade of grey, however that is a slow and messy process. To resolve the problem, I offered to colour the grout with a grey Tile Doctor Grout Colourant, my logic being that the colourant would not only change the look of the floor but also seal in the grout so any dirt or stains would be easily mopped away. The Tile Doctor Grout Colourant range comes in ten colours with several shades of grey which is always a popular choice.

Porcelain Tiled Floor Before Grout Colouring West Hill Devon

Colouring Cream Grout to Natural Grey

First thing to do when grout colouring is to clean up the grout using a Pre-Treater, this product is slightly acidic which has the added benefit of etching the grout to make a better bond with the colourant.

For best results the colourant needs to sit within the recess of the grout line and on this floor, there were several areas where the grout was at the same level as the tile surface. To resolve this problem, I used a Grout-Out tool to grind away the excess grouting.

Porcelain Tiled Floor During Grout Removal West Hill Devon

Next, I began carefully applying the Grout Colourant to floor with a small brush wiping off any excess as I went. The customer wanted to see how it would look before I did the whole floor so I stopped after completing a small square so they could see the difference.

After inspecting the test area, they were thrilled with the results and I’m sure the money they were about to save using this solution. I completed the remainder of the floor the same day and they were happy with the new and practical dark grey grout lines.

Porcelain Tiled Floor After Grout Colouring West Hill Devon


Professional Grout Colorant Application in Devon

Changing the Colour of Grout on a Porcelain Tiled Floor in West Hill Devon Read More »

Cream Marble Tiled Floor Polished in Lympstone Devon

Wax Sealed 130m2 Cream Marble Tiled Floor Polished in Lympstone

I was asked to pop over to the village of Lympstone to survey a beautiful Cream Mable tiled floor. The owner of the property was unhappy with its appearance as the wax-based product used to seal it previously had significantly dulled over the years resulting in a flat/matte look and making marks extremely obvious and difficult to remove.

Wax based products like the one used on this floor and a traditional method for protecting Marble floor but its easily marked, tricky to remove and with the advent of modern stone sealing products it’s not a solution we recommend

After surveying the 130m2 of Marble tiles, I could see the best way forward would be to remove the wax, clean the floor and then use a ‘Burnishing’ process to bring up the deep natural shine in the stone and then seal to protect. I explained the process in full and a date was agreed for my return to do the renovation.

Marble Floor Before Polishing Lympstone Devon

Deep Cleaning Red and Brown Marble Kitchen Tiles

I began by scrubbing in Tile Doctor Cleaner/Stripper product called Remove & Go, this emulsified and broke down the wax seal, loosened up any surface dirt and marks and cleaned up the grout lines which was significantly discoloured due to years of use.

I find the best was to do this it to spray on the Remove and Go, then let it soak into the tile and then run over each tile with a black scrubbing pad. Pads can struggle to reach into the recesses of the grout line so to ensure a thorough clean I also run a stiff hand brush over the grout.

The floor was rinsed with water and then the soiling extracted with a wet vacuum. It was important to remove the wax before starting the next stage of burnishing other wise the diamond pads used in this process will become clogged with remnants of wax.

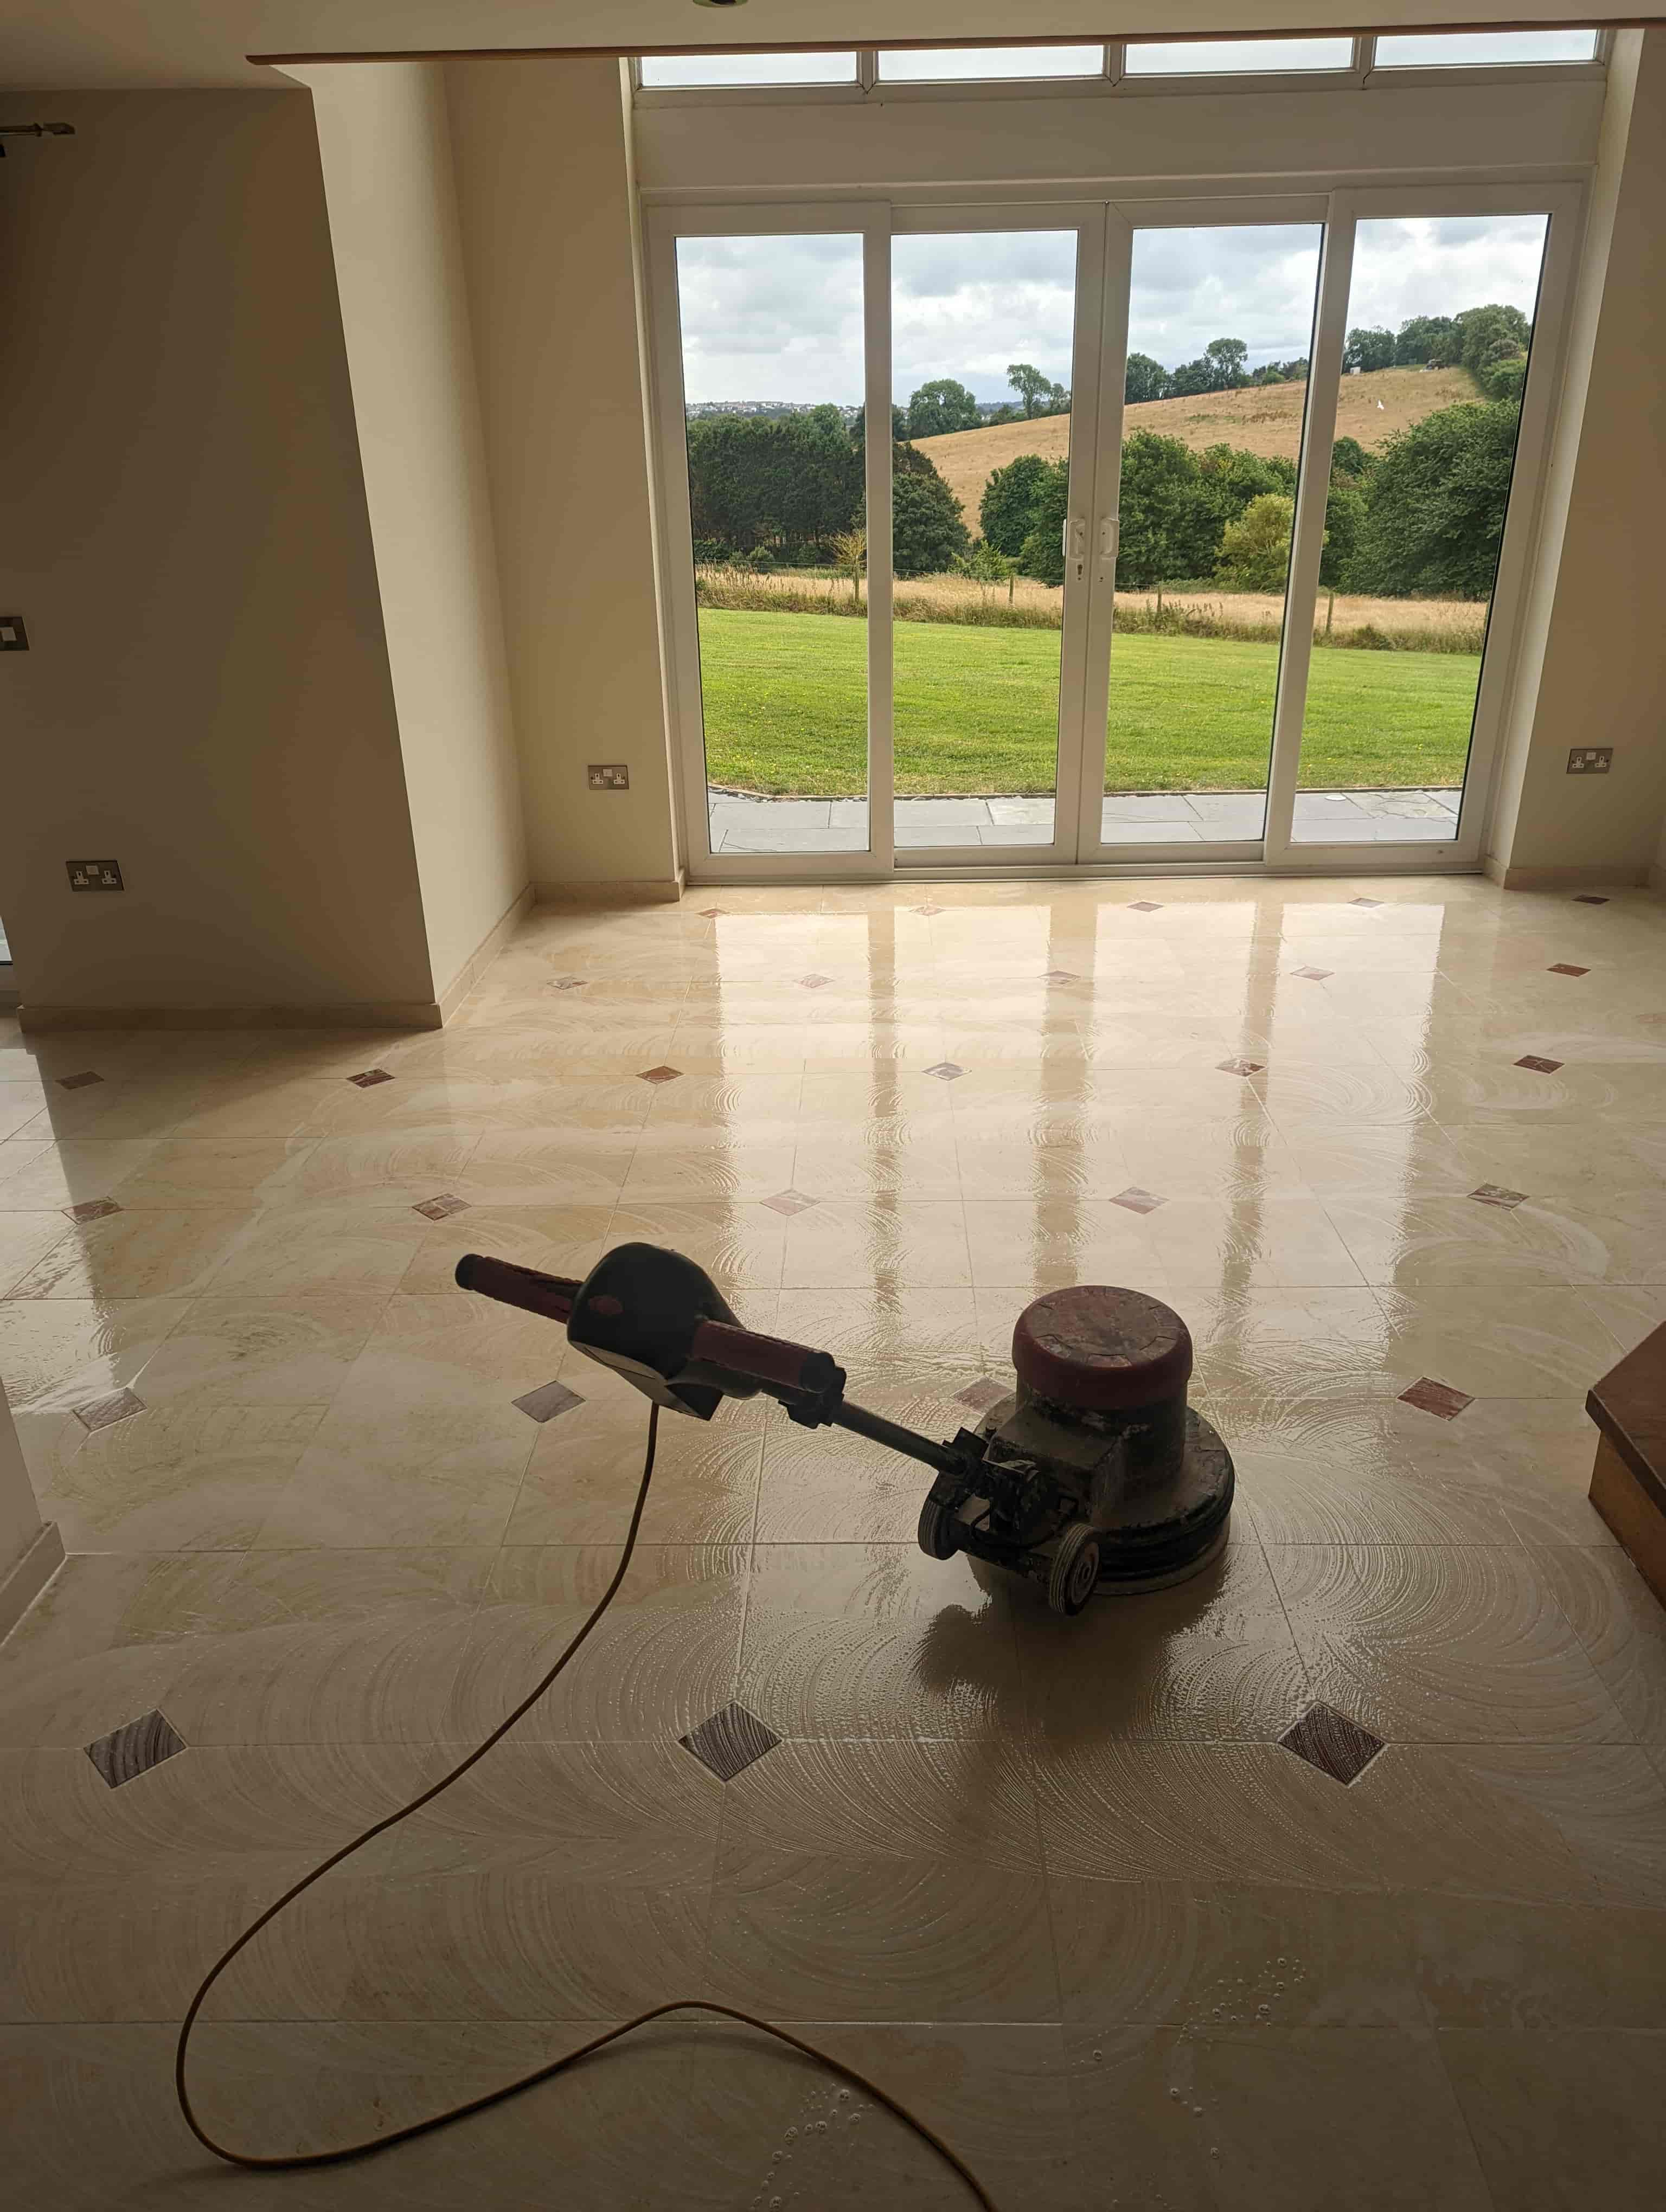
Marble Floor During Polishing Lympstone Devon
With the wax removed the chemical clean was complete and I was ready to move onto burnishing the Marble. On this occasion I stared with an 800-grit diamond burnishing pad fitted to a rotary machine running with added weight to make better contact with the floor. I only use water to lubricate the process and make eight to ten passes over each section. The process is then repeated without the weights using a 1500-grit diamond pad and water before vacuuming up the slurry.

Finally, I spray a small amount of fresh water onto the floor and burnish the Marble until almost dry with a 3000-grit diamond pad. This is the last step in the polishing processed and adds a lovely sheen to the stone.

Marble Floor During Polishing Lympstone Devon

Sealing Red and Brown Marble Kitchen Tiles

After the floor had been buffed dry, I finished by sealing the marble with Tile Doctor Ultra seal which is a specially formulated seal specifically for polished marble. It’s a natural look sealer that doesn’t change the characteristics of the stone and is almost invisible.

Ultra-Seal is an impregnating sealer that provides durable protection by impregnating the pores in the stone with sealer, so dirt cannot become ingrained there. The results were sharp and obvious and the customers were both very happy with the results and was a large job on their renovation tick list completed.

Marble Floor After Polishing Lympstone Devon
For aftercare cleaning of polished stone floors, we recommend using Tile Doctor Stone Soap, it’s compatible with sealers and helps maintain the patina on the stone.


Professional Restoration of a Marble Tiled Kitchen Floor in Devon

Wax Sealed 130m2 Cream Marble Tiled Floor Polished in Lympstone Read More »

Deep Clean and Seal for Dirty Slate Kitchen Tiles in Honiton

Deep Clean and Seal for Dirty Slate Kitchen Tiles in Honiton

Honiton is an old market town in East Devon with some interesting history. Most of the main buildings in the centre town are Georgian – dating back to the 18th century – and the town has been the site of the annual Honiton Agricultural Show since 1890.

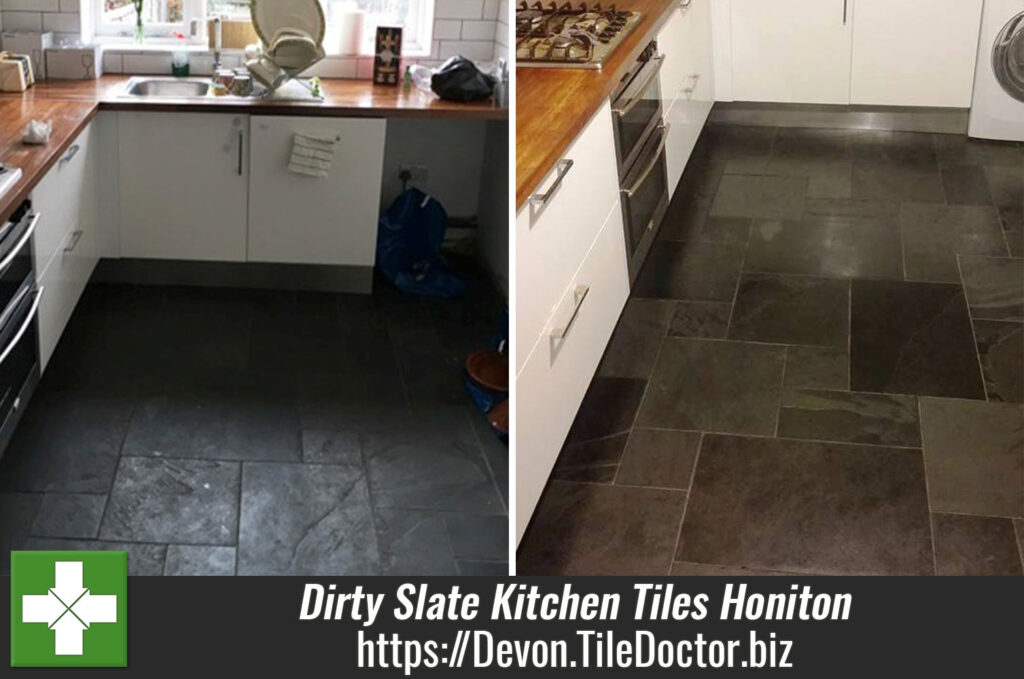
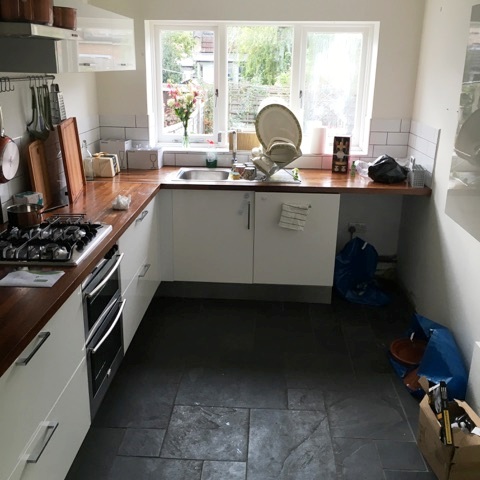
I visited this quaint area not too long ago to visit a customer. The customer’s Slate tiled kitchen floor, as you can see from the photograph below, was looking worst for wear. The sealer had worn off and dirt and grime had penetrated the pores of the stone, this made the tiles difficult to clean and the new owners of the house were having trouble improving the appearance of the floor. They thought that the tiles were laid about eight years previously but that there had been no real cleaning or maintenance on it.

Sealers are the sacrificial-lamb for tiles and stone floors and do a great job of protecting and enhancing the floor but only last around 2-4 years on normal-traffic floors such as this. Regular maintenance can extend this and topping up of the sealer once a year can see this continue indefinitely. Tile Doctor can help with any maintenance plans and can be discussed as part of any visit

Kitchen Slate Tiled Floor Honiton Before
I was called in to get this Slate tiled kitchen floor back to looking its best and easy to clean.

Cleaning a Slate Tiled Kitchen Floor

In this case the sealer that had been used was past its best and was attracting dirt and holding it in, so the only option would be to completely strip the floor and re-seal. The grout had also been discoloured over the years and there are a few options to get grout looking its best again.

Grout is more prone to discolouration than the tiles but usually comes up well using Tile Doctor products Remove and Go, Pro Clean or Duo Clean. If the grout is discoloured beyond repair a grout recolour is the best way forward and a variety of colours are available.

This floor was stripped of old sealers using Tile Doctor’s Remove and Go, a strong alkaline stripper and degreaser plus coarse buffing pad on a rotary scrubber to remove any traces of previous sealers plus normal kitchen oils and stains. The grout was also scrubbed for good measure using a special grout brush and the floor was thoroughly rinsed with water and a wet vac to ensure that any remaining chemicals were neutralised and removed.

This process left the floor fresh and clean – and ready to be left to dry completely overnight.

Sealing a Slate Tiled Kitchen Floor

After leaving the floor to dry overnight, I returned to the property to seal it. Before doing so, I ran a few damp tests – aware that the property is reasonably old and may not have a damp proof membrane installed. Any excess moisture can cloud the sealant and damage its performance, but thankfully this floor proved to be dry.

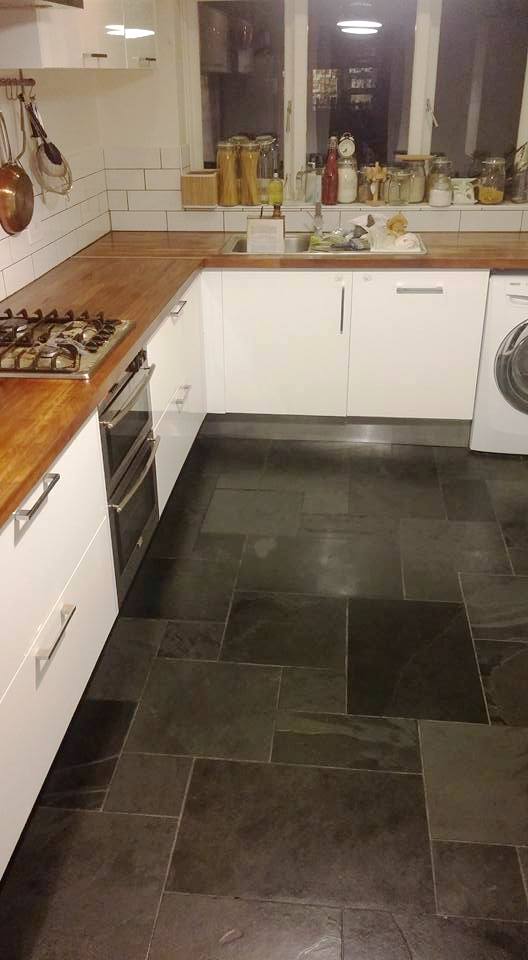
I proceeded then to seal the tiles using Tile Doctor Colour Grow. This is our impregnating sealer which enhances the dark natural shades in the Slate, as you can clearly see from the photo below. As an impregnating sealer, it penetrates the pores of the stone to fill them and block dirt and stains from becoming ingrained.

Kitchen Slate Tiled Floor Honiton After
The restoration was truly transformative and as you can see from the picture above the grout came up very well so a recolour wasn’t necessary.

Professional Restoration of a Dirty Slate Tiled Kitchen Floor in Devon

Deep Clean and Seal for Dirty Slate Kitchen Tiles in Honiton Read More »

=================================

Devon Tile Doctor

================================= Read More »

Scroll to Top