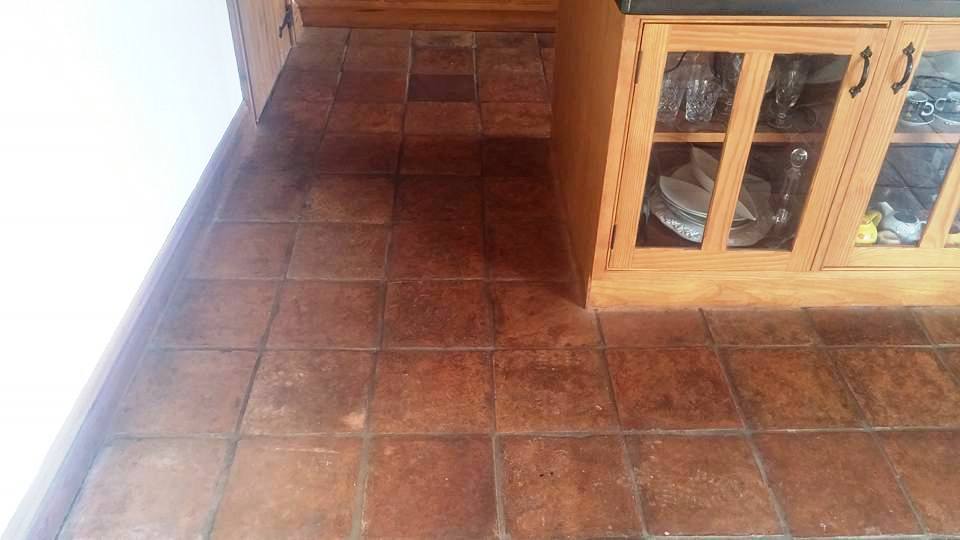
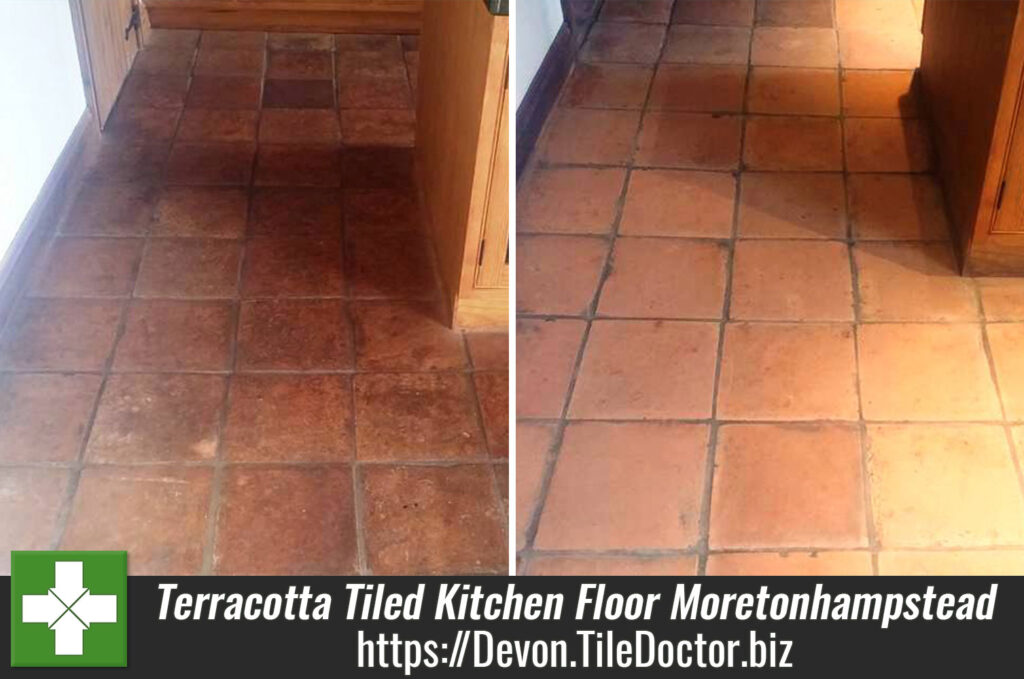
Earlier this year I was called to the Dartmoor town of Moretonhampstead in order to take a look at a large Terracotta tiled kitchen/dining room which the owners had ‘lived with’ for over a decade but were finding it harder and harder to keep clean. Upon arrival, I could see that any sealer that had been used previously was well beyond its best and the floor was holding in the dirt and grime because of how porous unsealed terracotta is.

I conducted a test on a small area of the floor which not only helped me to identify the most suitable product to clean the floor with but also to show the customer how much of an impact a professional clean and seal of a floor is likely to have. The first product I tried was Tile Doctor Pro-Clean which although cleaned the tiles very well I could tell was going to be a problem when it came to rinsing because the floor was absorbing it almost as quickly as I was able to put it down! My solution came in the form of Tile Doctor Oxy-Gel which is a very similar product to Pro-Clean and is a very powerful stripper/degreaser but has the added benefit of being in gel form, so it sits on the tiles rather than becomes absorbed into them. It is also a very good option for riven stone, uneven tiles or undulating floors because unlike a liquid it will not run off the high spots.
The clients were thrilled with the test area and couldn’t believe how much lighter the tiles were and as soon as I sent them my quote they booked me in at my next availability.
Deep Cleaning Terracotta Tiles
When I returned to the property my first task was to protect the woodwork from splashing by dressing the skirting boards and kitchen plinths in a blue plastic covering. I then set to work applying Oxy-Gel to the tiles and allowing it to dwell for about five minutes before scrubbing it in with a stiff bristled brush fitted to a rotary buffer.
The scrubbing action released the dirt form the Terracotta and I was then able to extract it from the floor using a wet vacuum. I worked methodically in small areas at a time and when the whole floor was done it was given a thorough rinse to remove any trace of cleaning products from the floor. I also checked the floor carefully and spot treated any stubborn staining and used the wet vacuum to get the floor as dry as possible before leaving for the day.

Sealing Terracotta Tiles
After I was satisfied that the tiles were all clean I then needed to wait for the floor to dry before I could seal. As I mentioned these tiles were very porous and so took longer than usual to dry out but once the moisture levels were at an acceptable level I returned to finish the job.
Once terracotta has been stripped it can reveal historic damage such as acid stains or from inappropriate cleaning products which look like lighter patches on the tiles. Upon my return I spent a while improving any areas like this by using diamond encrusted burnishing pads to resurface the tiles. In general, it is not recommended on terracotta because you lose the natural texture of the tiles and create a smooth finish but in this instance the customer decided that this was preferable to the stains remaining visible.
After both the customer and I were happy with the condition of the tiles I began to seal the floor with Tile Doctor Seal and Go, an acrylic based sealer which would give the tiles a slightly glazed or freshly mopped appearance. Because of the porosity of this particular batch of terracotta tile it took eleven coats before the floor was fully sealed!
The customer was very happy, and the tiles lit the room up, transforming it.


Never use a strong cleaning product or a steam cleaner for the regular cleaning of sealed floors as this will reduce the life of the sealer. We recommend using a specialist cleaning product such as Tile Doctor Neutral Tile Cleaner for the regular cleaning of sealed tile and stone, if you do use another product always read the label first, most supermarket tile cleaners are only suitable for use on glazed Ceramics, non-sealed Porcelain or Vinyl tiles.